Using Adafruit Fona GSM/GPRS breakout to log data to Xively

Collecting and logging sensor data automatically is one of the most useful “sciencey” things you can do with programmable microprocessors like Arduino and Raspberry Pi. One problem with this is what to do with the data you are collecting. You can store it locally to the device, for example Arduinos can log temperatures or movement signals from PIR sensors to SD cards. However, you have to turn the device off and remove the card, put it into a laptop and copy the data off it before you can access it. Alternatively you can send the data over a serial connection or wirelessly to another device which will store the data for you for easier retrieval or even real-time plotting. Recently small GSM/GPRS modules have become available which are essentially the guts of a mobile phone with no screen, battery or keyboard. These enable you to use mobile phone networks to send data to the internet using protocols such as GPRS and 3G. This is very useful for science as field experimental sites rarely sport ethernet ports or wireless routers through which to transmit data from long-term monitoring sites.

The Adafruit Fona is one of these devices and I obtained one with the intent of monitoring the temperatures in some of our more critical freezers and fridges in case one of them broke down, imperilling the irreplaceable scientific samples stored within. I’ve already set up one device using a GPRS shield from Elecrow. You can see the feed from it here. Its logging temperatures from three freezers in a shed on AUT’s North Campus where various valuable samples are stored. The Fona is a little smaller and a little cheaper and I wanted to make another couple of devices to deploy in our labs to keep an eye on the freezers there. These contain not only valuable samples but, in our molecular labs, thousands of dollars worth of reagents for the MiSeq, our next generation sequencing platform. The idea here is not just to keep an eye on the functionality of the freezers but to get notified if the power goes down. Freezers are well insulated so if the power goes off the temperature won’t immediately rise. If the power goes off on Friday evening, however…

In setting up the Fona I ran into problems getting code to work. The Fona code examples for GPRS access were limited to simple website recovery and not sending HTTP PUT requests, which is what is required to log data to Xively. Frustratingly the code I’d adapted from my previous GPRS logger didn’t work and I could find no indication as to why. Even more frustratingly the Arduino Xively libraries didn’t work either, probably because they had been written for use with WiFi or ethernet and not GPRS. Instructions are sent to the GPRS shields from your microprocessor using a special set of text commands, called AT commands. These commands need to be sent to the shield over a serial connection. The HTTP PUT requests sent to Xively must conform to something called REST, which is explained in somewhat inadequate detail in Xively’s API docs. So, to summarise: I had to use my Arduino to send AT commands to the Fona over serial that would instruct it to send PUT requests conveying my data to Xively. Three different communication protocols. Simples!  >_<

To cut a long story short I managed to use a Python library to send updates from my laptop to Xively by HTTP PUT requests. Using more Python I then managed to log the text of those HTTP requests and use that as a template that I could deconstruct and send to the Fona from my Arduino, inserting real-time data from sensor reads. The result is the code linked at the bottom of this post, which logs temperature, pressure and humidity data from an Adafruit BME280 sensor as well as the battery voltage of the Li-Ion cell connected to the Arduino and Fona. Credit to Limor Fried/Ladyada and Chip McLelland, whose example sketches I adapted to create this.

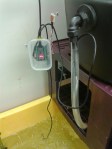
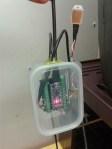
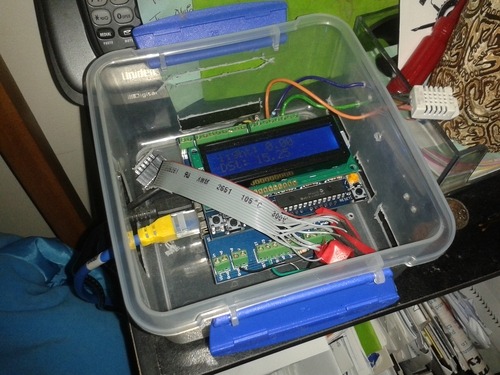
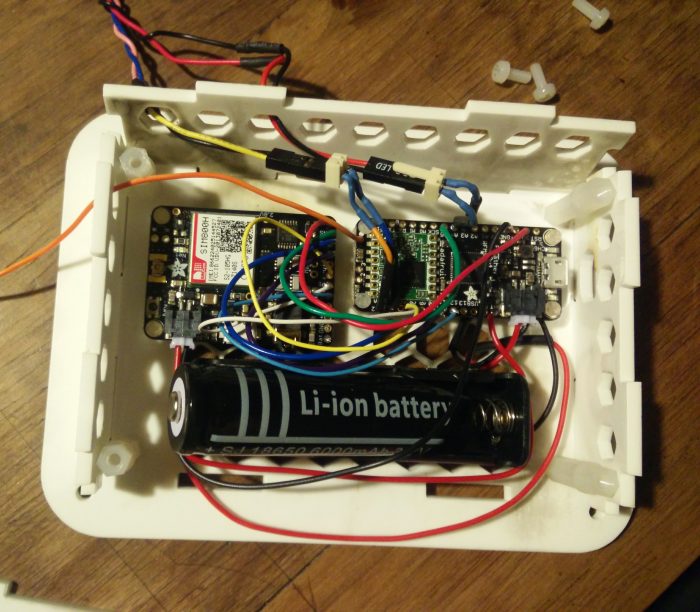
Here’s a quick pic of my setup. Its a Feather 32u4 LoRa, a uFL Fona and a BME280, all from Adafruit Industries. The Fona must have a lithium battery connected to it so I’ve added an 18650 Li-ion cell which is connected to both the Feather, which charges it, and the Fona. If the power does go out at work then the device will run for several hours on this battery, even without any low-power optimisation of the code. The enclosure is lasercut from 3mm acrylic. Its a beta version as I’ve yet to add mounts and an enclosure for the BME280. Ultimately I want this sketch to read three DS18B20 temperature sensors too, which will be in the freezers, but that’s a work in progress.

img_20161203_231247

Download this code: Adafruit_Feather_Fona_BME280.ino

Advertisement

A couple of shots showing an Arduino Nano I’ve put into the aqualab to monitor the sump temperatures on the recirculation system for an upcoming ocean acidification project run by Kay Vopel (http://www.vopel.org/). The Nano is reading two waterproof DS18B20 temperature sensors, one in the sump and one on the outflow from the mixing barrel, as well as a DHT22 air temperature & humidity sensor. The sensors are fed through holes melted in the HDPE of the little tupperware container its mounted in and the holes have been sealed with hot glue. The Nano is on the end of a 5m USB cable that stretches over to the PC on the bench opposite.

The monitor is showing my Processing datalogger sketch running. There’s two incidences of the sketch running, as there’s two recirculation system so there’s two Arduinos. The second one doesn’t have a DHT22. The data is plotted, shown numerically at the top of the screen and logged to text file. One day I’ll hack out a solution to read data from two Arduinos into one sketch but for now this was a quick and dirty solution.

Both plots show a pink and a yellow line climbing gently across the screen. These are the water temperatures. The MSc student increased the temperature on the water cooler yesterday and the system’s still equilibrating. The blue zig-zag line shows the air temperature bouncing up and down as the aircon switches on and off.

Auckland Winter humidity problems

I’ve got a climate datalogger in my house here in West Auckland. Its based on an Etherten from Freetronics, which is an ethernet-enabled Arduino Uno compatible board. On that is sat a wing screw shield for easy connection of wires and on top of that is sat an Adafruit LCD shield showing the readings.

image

Inside or outside it are a DHT22 temperature and relative humidity sensor, a BMP085 air pressure and temperature sensor, a DS18B20 temperature sensor and a light dependent resistor. The sensors are polled every 20s and the data uploaded to Xively. The BMP temperature sensor reads a few degrees high because its inside the plastic box, exposed to the warmth from the circuitry. The DS18B20 generally reads a couple of degrees low because its hanging down the back of the shelves the logger sits on, away from ambient air movement (although this is, of course, still interesting [to me, anyway]). The whole affair runs off a 5V power supply connected by USB. 

Here’s a shot of the log from the last few days. The gap in the data is where the logger hung and had to be reset, by the way.

As you can see, after a series of cold, wet days- indicated by the small peaks in the ‘light’ plot at the top left- relative humidity climbs to nearly 100%. This is despite us leaving the heat pump and a pair of heaters running all night. This was not helped at all by the need to dry clothes inside when its too wet outside, adding to the moisture in the air.

As a consequence I now have mould growing on the shelves in my bedroom!

image

Yay, for houses with poorly fitting, single-glazed windows and no insulation!

Here’s the Arduino sketch, if anyone’s interest.

#include <SPI.h>
#include <Ethernet.h>
#include <HttpClient.h>
#include <Cosm.h>

// ! ! USB DEBUG OPTION ! !
int debug = 0;

// Sensor setup
#include “Wire.h”
#include “Adafruit_BMP085.h”
#include “DHT.h”
#include <OneWire.h>
#include <DallasTemperature.h>
#include <Adafruit_MCP23017.h>
#include <Adafruit_RGBLCDShield.h>

// MAC address for your Ethernet shield
byte mac[] = { 0xDE, 0xAD, 0xBE, 0xEF, 0xFE, 0xED };
IPAddress ip (192,168,1,65); // Available Static IP address on your Network. See Instructions

// Your Cosm key to let you upload data
char cosmKey[] = “@@@@@ your key goes between the quotes here @@@@@@@”;

#define FEED_ID 76854;
unsigned long feedID = FEED_ID;

// Define the strings for our datastream IDs
char sensorID0[] = “BMPp”;
char sensorID1[] = “DHTh”;
char sensorID2[] = “DSt”;
char sensorID3[] = “light”;
char sensorID4[] = “BMPt”;
char sensorID5[] = “DHTt”;

CosmDatastream datastreams[] = {
CosmDatastream(sensorID0, strlen(sensorID0), DATASTREAM_FLOAT),
CosmDatastream(sensorID1, strlen(sensorID1), DATASTREAM_FLOAT),
CosmDatastream(sensorID2, strlen(sensorID2), DATASTREAM_FLOAT),
CosmDatastream(sensorID3, strlen(sensorID3), DATASTREAM_FLOAT),
CosmDatastream(sensorID4, strlen(sensorID4), DATASTREAM_FLOAT),
CosmDatastream(sensorID5, strlen(sensorID5), DATASTREAM_FLOAT),

};
// Finally, wrap the datastreams into a feed
CosmFeed feed(feedID, datastreams, 6 /* number of datastreams */);

EthernetClient client;
CosmClient cosmclient(client);

// LCD shield

Adafruit_RGBLCDShield lcd = Adafruit_RGBLCDShield();
#define WHITE 0x7

Adafruit_BMP085 bmp;
//
//// Data wire is plugged into which pin on the Arduino?
#define ONE_WIRE_BUS 6
//
//// Setup a oneWire instance to communicate with any OneWire devices (not just Maxim/Dallas temperature ICs)
OneWire oneWire(ONE_WIRE_BUS);
//
//// Pass our oneWire reference to Dallas Temperature.
DallasTemperature sensors(&oneWire);

#define DHTPIN 3 // what pin we’re connected to
#define DHTTYPE DHT22 // DHT 22 (AM2302)
DHT dht(DHTPIN, DHTTYPE);

float light;

void setup() {
// put your setup code here, to run once:
Serial.begin(9600);
lcd.begin(16, 2);
lcd.setBacklight(WHITE);
lcd.print(“initialising”);

Serial.println(“Starting single datastream upload to Cosm…”);
Serial.println();

if (debug < 1 ) {

while (Ethernet.begin(mac) != 1)
{
Serial.println(“Error getting IP address via DHCP, trying again…”);
Serial.println(millis());
// lcd.clear();
lcd.setCursor(0,0);
lcd.print(“Error getting IP”);
lcd.setCursor(0,1);
lcd.print(millis()/1000);
delay(5000);
}
}

// set pin modes to power sensors
pinMode(7, OUTPUT);
pinMode(5, OUTPUT);
pinMode(4, OUTPUT);
pinMode(2, OUTPUT);

digitalWrite(7, LOW);
digitalWrite(5, HIGH);
digitalWrite(4, LOW);
digitalWrite(2, HIGH);

// initialise sensors
bmp.begin();
dht.begin();
sensors.begin();

delay(100);

}

void loop() {
lcd.clear();
lcd.setCursor(0, 0);
lcd.print(millis()/1000);

// Get sensor readings
// BMP085
float BMPt = bmp.readTemperature();
float BMPp = bmp.readPressure() / 100.0;

// DHT22
float DHTh = dht.readHumidity();
float DHTt = dht.readTemperature();

// DS18B20
sensors.requestTemperatures(); // Send the command to get temperatures
float DSt = (sensors.getTempCByIndex(0));

// get light
light = analogRead(0)/ 10.23;

datastreams[0].setFloat(BMPp);
datastreams[1].setFloat(DHTh);
datastreams[2].setFloat(DSt);
datastreams[3].setFloat(light);
datastreams[4].setFloat(BMPt);
datastreams[5].setFloat(DHTt);

if (debug > 0) {

/*———–( Show the values inside the streams for test/debug )—–*/
Serial.println(“—–[ Test: Check values inside the Streams ]—–”);
Serial.print(“BMPp: ”);
Serial.println(datastreams[0].getFloat()); // Print datastream to serial monitor
Serial.print(“DHTh: ”);
Serial.println(datastreams[1].getFloat()); // Print datastream to serial monitor
Serial.print(“DSt: ”);
Serial.println(datastreams[2].getFloat()); // Print datastream to serial monitor
Serial.print(“light: ”);
Serial.println(datastreams[3].getFloat()); // Print datastream to serial monitor
Serial.print(“BMPt: ”);
Serial.println(datastreams[4].getFloat()); // Print datastream to serial monitor
Serial.print(“DHTt: ”);
Serial.println(datastreams[5].getFloat()); // Print datastream to serial monitor
delay(2500);
}

if (debug < 1) {
Serial.println(“Uploading to Cosm”);
lcd.clear();
lcd.setCursor(0,1);
lcd.print(“sending to COSM”);
int ret = cosmclient.put(feed, cosmKey);

Serial.print(“COSM client returns: ”); // Get return result code, similar to HTTP code
lcd.clear();
lcd.setCursor(0,0);
lcd.print(“COSM client”);
lcd.setCursor(0,1);
lcd.print(“returned: ”);
Serial.println(ret);
lcd.print(ret);
Serial.println();
delay(500);
lcd.clear();
lcd.setCursor(0,0);
lcd.print(“BMPp: ”);
lcd.print(BMPp);
lcd.setCursor(0,1);
lcd.print(“BMPt: ”);
lcd.print(BMPt);
delay(3500);
lcd.clear();
lcd.setCursor(0,0);
lcd.print(“DHTh: ”);
lcd.print(DHTh);
lcd.setCursor(0,1);
lcd.print(“DHTt: ”);
lcd.print(DHTt);
delay(3500);
lcd.clear();
lcd.setCursor(0,0);
lcd.print(“light: ”);
lcd.print(light);
lcd.setCursor(0,1);
lcd.print(“DSt: ”);
lcd.print(DSt);
delay(3500);
}
}