
Hopefully this will be the start of a series of posts on the Internet of Bees, or the #IOBee. In case you didn’t realise, this is a play on the Internet of Things, or IoT. My intent with the IOBee is to document my application of some basic sensor technology to monitoring the health of bee hives.
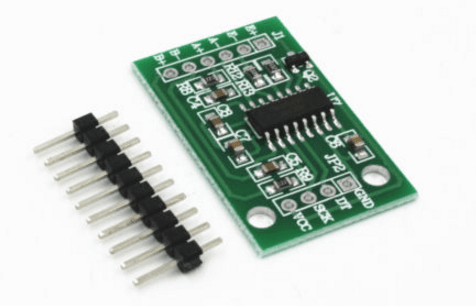
There is an excellent writeup here of a conversion of a set of luggage scales to a real-time bee hive mass monitor. I have been wondering if I can do the same thing to monitor the mass of experimental bee hives in some research I’m planning looking at the effects of neonicotinoids upon honey bee colonies. In order to test this out I ventured onto eBay and bought a couple of HX711 breakouts, which you can get for just a couple of dollars.
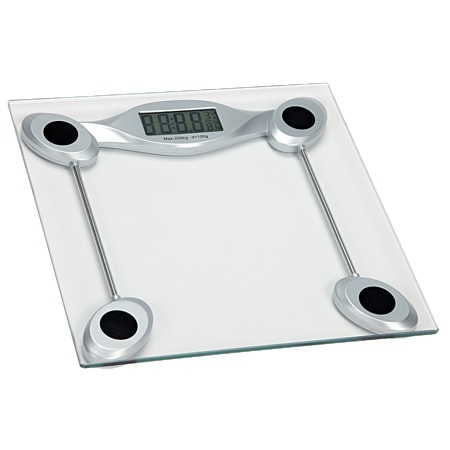
I also bought a cheap set of bathroom scales from the Warehouse, despite the advice on MakeZine, which advised not to skimp. I intended this to be a proof-of-concept so I wasn’t going to be spending big bucks just yet.
This turned out to be an excellent hacking subject. After taking the back off I found a circuit board carrying the integrated circuit, some components and some wires.
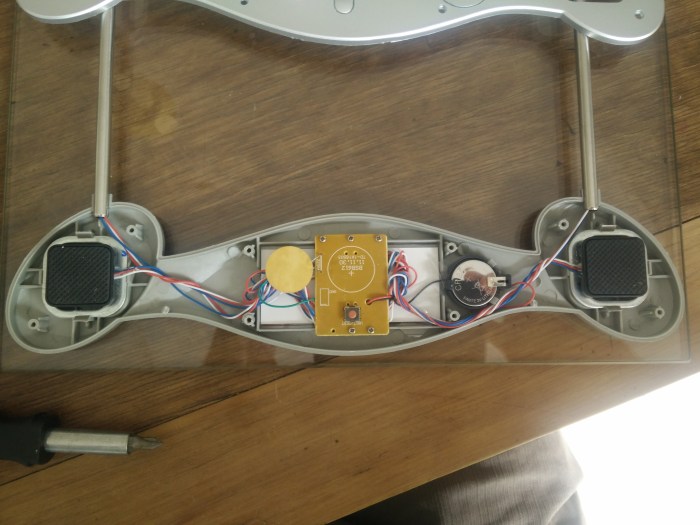
The two black pads you can see are the rubber feet on the bottom of the load cells. I prised one out to show you the other side.
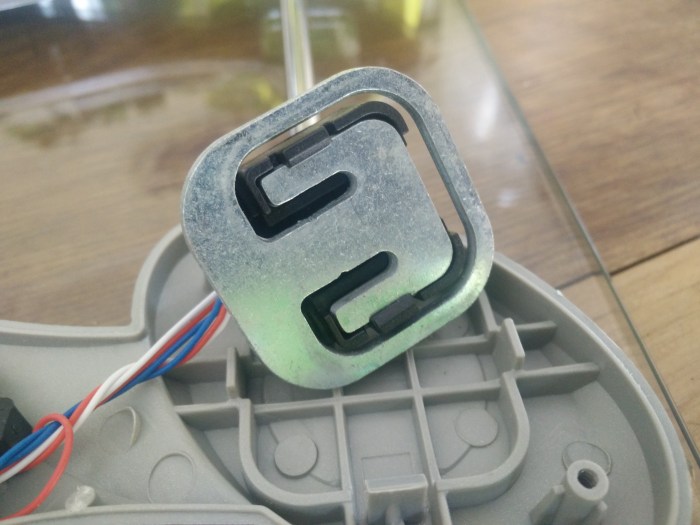
The red white and blue wires coming from each of the four load cells needed to be joined together carefully according to the first image in this excellent post on StackExchange that I located after a modest amount of googling. I also found this how-to from SparkFun to be informative.
Once I had soldered the blue and white wires together to mimic the pattern shown and the red ones to the appropriate pads on the HX711 breakout I was left with this:

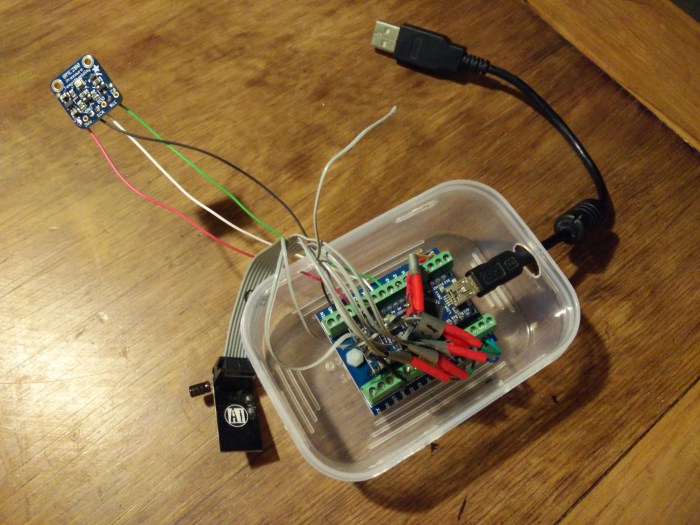
I also soldered the wires from a length of USB cable from an old mouse to the other side of the breakout. The four tabs and their wires were to VCC (red), GND (black), CLK (white) and SDA (green). I drilled a hole in the plastic chassis to pass the cable through and put a cable tie around it on the inside to prevent the wires being pulled off the board. The mount holes in the breakout board ( I love mount holes!) happened to be just the right width to allow me to screw it to the chassis through two of the holes that the original PCB was mounted on. The white thing is a piece of polyethylene milk bottle wall that I cut out and used to insulate the connections of the breakout and to hold it down as the screw heads were nearly as small as the holes. This arrangement allowed the breakout to be seen through the glass window where the LCD used to be. A nice touch. 😀

Having wired everything together I needed an electronic brain for my creation to talk to so I hooked it up to the Arduino Nano I’ve been using as a receiver for my solar-powered, wireless monitoring testbed. Ignore the BME280 and the NRF24 coming off it. VCC went to 5V, GND to GND, SCK to D4 and SDA to D5.
I downloaded the HX711 library written by bogde (thanks!) and also the HX711 breakout sketches from the SparkFun how-to linked above. I was pretty impressed to see numbers appear straight away on the serial monitor although this turned to mild disappointment when I placed a mass on the scales and the number went negative! Apparently I had got the polarity of the signal wires the wrong way around. 😦
Five minutes of soldering later I was back reading numbers and this time they went up with the mass on the scales. According to the instructions on the test sketch I kept adjusting the calibration factor until the scales read the correct mass for the object I’d put on it. Then came the acid test: now it was calibrated, would it get my mass right?

As you can see it worked almost perfectly. And I am somewhat overweight. ![]()
A useful edit I made to the SparkFun code was to change the line
Serial.print(scale.get_units(), 1);
To
Serial.print(scale.get_units(), 3);
This gave me three decimal places instead of one and significantly more information. I was particularly pleased to see that these scales read quite consistently. The numbers for my weight jump about quite a lot because I wasn’t too worried about keeping still to get a stable reading but when I placed a fixed mass on the scales the second decimal place was pretty stable and only the third flicked up and down by 1-3 units. These scales were advertised as being accurate to +/- 100g so my results indicate I can do much better than that. And that’s without any of the tricks you can use with microprocessors to improve the accuracy of otherwise low resolution tools, such as polling them and taking a moving average.
More on the application of this very cool hack another day, once I’ve validated the calibration as described on MakeZine.


[…] on from my bathroom scales hack I spent this evening sawing and screwing together the platform for it to sit on. This was an urgent […]
LikeLike
Your design looks okay, but could I get this signal to a smartphone using sms?
LikeLike
Yes, I’m sure you could but how often? SMS is expensive for sending data regularly. You’re better of using GPRS and sending the data to Xively.
LikeLike
I would only need to get 1 sms per day with lets say 4 readings at desired hours. I know its a lot of data to fit in only 1 SMS but that shouldnt be a problem
LikeLike
I am doing electronic scales and hx711, max = 180kg (380lb). you can send file code to me.
LikeLike
I am doing electronic scales and hx711, max = 180kg (380lb). ZIP file you can send to me
LikeLike
Hi,
thnx for your guide. I have the same problem the numbers going negative.
Did you mean that you changed the E+ to E- and the A+ to A- ?
LikeLike
I got 24 of my hives setting on a load cell similar to yours but only under the back end (measure approx 1/2 the weight). The hx711 feeds into and ESP32 for each hive along with temperature and moisture. The infor in ea ESP32 to polled by a Raspberry Pi every 5min 24/7 and fed into a csv file that I can see in a spreadsheet and can graph each hive or several hives together to compare. My problem is keeping the ESP32 on WIFI (known problem with these???). I also have and Rasp Pi polling 24 temp probes every min 24/7 and can be graphed too. Can set in my house about 250ft from my 40+ hives.
LikeLike
Only use 1 cell per hive to save money per installation. Have front of hive even with front of hive and the cell is under the back under a piece of U shaped metal fence. I have used the load cells from a bathroom scale 2 of them side by side into the ESP32. Can make up a unit per hive for about $50. Have had them in service for about 6mo. Can use a trapeze arrangement to pick up the back of the hive and a baggage scale to check and/or recalibrate the cell.
LikeLike